
ATC Truck Cap Won't Lock? Here's How to Fix the Striker Plate, Latch & Key Cylinder
A truck cap that won’t lock leaves your cargo exposed and your tailgate vulnerable. When your ATC truck cap lock refuses to latch—or the key won’t turn—the culprit is usually one of three components: a misaligned striker plate, a dirty or corroded latch mechanism, or a worn key cylinder.
We built thousands of caps in our Sulphur Springs, Texas facility, and our service team logs these exact complaints every week. The good news: most lock failures trace back to adjustments you can make in your driveway with a screwdriver and a can of lithium grease. Below we’ll show you how to diagnose which part is causing the problem, then fix it without replacing the entire assembly.
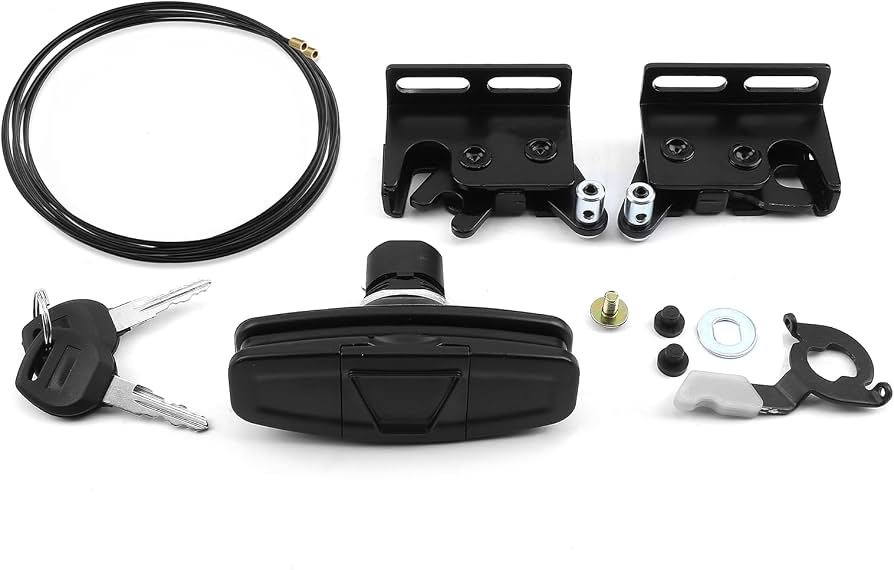
Check the Striker Plate First—It Moves Over Time
The striker plate is the metal loop or post mounted to your tailgate that the cap’s latch hooks onto. Road vibration and repeated slamming can shift it a quarter-inch out of alignment, which is enough to prevent the latch from catching.
Open the cap and look at where the latch meets the striker. If the latch tongue misses the striker opening by more than an eighth of an inch, loosen the two bolts holding the plate to the tailgate and shift it until the latch slides cleanly into the striker loop. Tighten the bolts, close the cap, and test the lock—most cases resolve here.
If the plate appears bent or cracked, replacement striker hardware is available through our cap service pages and installs in minutes with the same two bolts.
Clean and Lubricate the Latch Mechanism Every Six Months
Dust, road salt, and dried grease build up inside the latch housing and prevent the spring-loaded tongue from retracting fully. When that happens, the lock cylinder turns but the latch won’t release—or it won’t engage in the first place.
How to Clean the Latch
Spray the latch body with a degreaser or brake cleaner, then work the handle back and forth to flush out grit. Let it dry, then apply a thin bead of white lithium grease to the pivot points and the latch tongue itself. Avoid heavy oils—they attract more dirt and gum up faster than grease.
If you own one of the taller-profile models like the LHR mid-rise or LED cap, the latch sits higher and collects more highway spray, so cleaning twice a year is worth the effort.
Diagnose a Worn Key Cylinder Before Replacing It
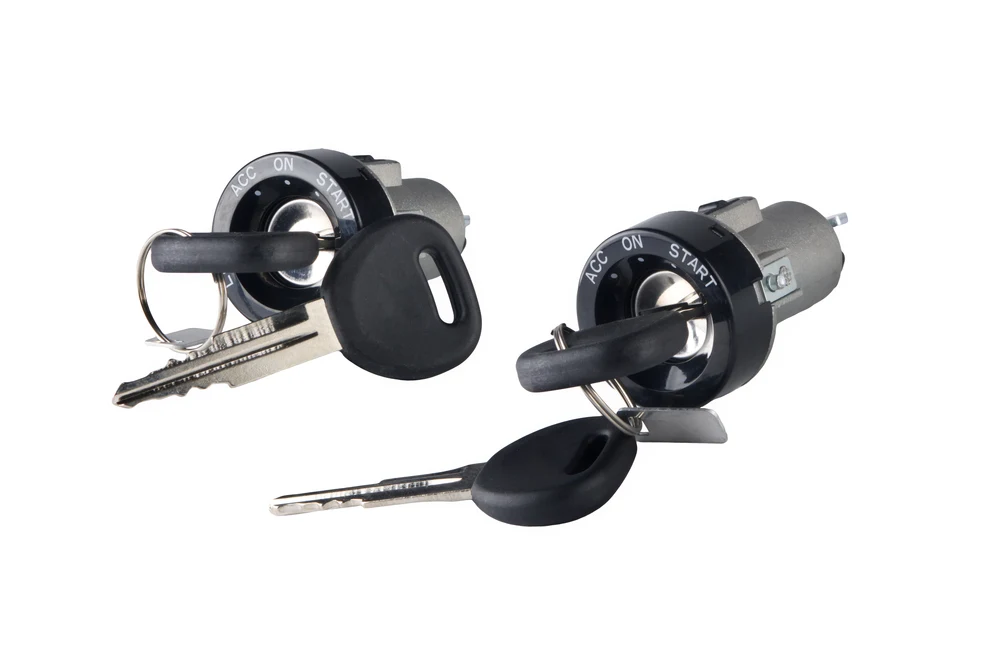
If the key turns but nothing happens—or it won’t turn at all—the lock cylinder may be worn or the internal pins may be binding. Before you order a replacement, try spraying graphite powder (never liquid oil) into the keyway and working the key in and out a dozen times. Graphite lubricates the pins without attracting dirt.
If the key still won’t turn, compare it to a spare. Worn keys develop rounded edges that no longer lift the pins correctly, and cutting a fresh key from the original code often solves the problem without touching the cylinder. According to the Builders Hardware Manufacturers Association, a typical automotive-style lock cylinder is good for 10,000–15,000 cycles, so if your cap is ten years old and you’ve never serviced the lock, replacement may be the right call.
Replacement cylinders are keyed to match your original cap keys and swap in by removing a single retaining clip on the back of the lock housing.
When to Replace the Entire Latch Assembly
If cleaning and alignment don’t solve the issue—and the key cylinder tests good—the latch mechanism itself may be broken. Common failures include a snapped return spring, a cracked latch tongue, or stripped threads where the lock cylinder mounts.
Replacing the full assembly is straightforward: remove four screws from inside the cap, disconnect the latch from the handle rod, and bolt the new unit in place. The handle rod may need slight bending to align with the new latch, but no cutting or drilling is required.
OEM replacement latches designed for our topper lineup and camper-shell models maintain the same mounting pattern across decades of production, so even a twenty-year-old cap can accept a current-spec latch without modification.
A Ten-Minute Fix Saves a Service Call
Most ATC truck cap lock problems come down to a quarter-inch of misalignment or a teaspoon of dried grease—issues you can resolve with the tools already in your truck’s toolbox. Start with the striker plate, clean the latch if alignment doesn’t solve it, and test the key cylinder last.
If you’ve worked through every step above and the lock still won’t cooperate, the latch assembly itself may be cracked or the internal linkage bent—at that point a replacement unit is the fastest path back to a secure bed. But in fifteen years of building caps, we’ve seen striker adjustment and latch cleaning solve nine out of ten lock complaints, so those two steps are worth your time before ordering parts.
Common Questions About ATC Cap Lock Repairs
Yes, but it requires a locksmith with access to automotive pin kits. Most owners find it simpler to keep the cap key on the same ring as the truck key rather than rekeying the cylinder, since the process costs more than a replacement lock.
If you do rekey, make sure the locksmith uses pins rated for outdoor exposure—indoor-grade brass pins corrode quickly in a tailgate-mounted lock.
Water gets into the keyway, freezes, and jams the pins. Spray a silicone-based de-icer into the lock, wait thirty seconds, then try the key again.
To prevent it, cover the keyway with a small piece of tape or a magnetic key cover during freezing weather, and make sure the rubber gasket around the cap’s rear edge seals tightly so meltwater doesn’t pool near the lock.
Snug the bolts until the plate stops moving, then add a quarter turn. Over-tightening can strip the threads in the tailgate or crack the striker plate itself.
The goal is a firm connection without crushing the gasket between the plate and the tailgate—if the gasket is flattened, back the bolts off slightly.
The handle rod has slipped out of its clip or the return spring inside the latch has broken. Open the cap, remove the interior trim panel if your model has one, and check that the rod is seated in both the handle and the latch.
If the rod connection is intact but the handle still flops, the latch spring needs replacement—order a new latch assembly rather than trying to source the spring alone.
WD-40 works as a short-term cleaner to flush out dirt, but it evaporates and leaves no lasting lubrication. For long-term protection, follow up with white lithium grease on the latch mechanism and graphite powder in the key cylinder.
Never use heavy oils or silicone spray inside the lock cylinder—they attract dust and turn into a sticky paste that jams the pins.
Hold the key up to a light and compare the cuts to a spare or a photo of a new key. Worn keys show rounded valleys instead of sharp V-shaped cuts, and the tip may be bent or mushroomed from forcing it into a sticky lock.
If you have the original key code, any locksmith can cut a fresh key without seeing the old one—most ATC caps use standard automotive blanks.